Friday, June 9, 2017

Sofa/Entryway Table Makeover


Hi friends! I just love a good makeover, don't you? Today I took a boring, scraped up sofa table and gave it a fresh new look!


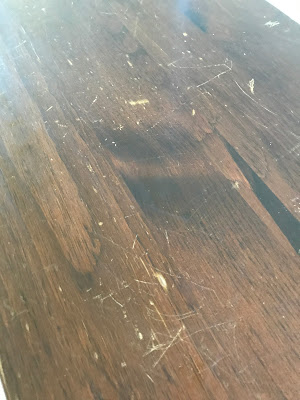
Here is how it looked before! I'm not sure what kind of wood this is, but it's very light.


 The stain was quite hard to come off, it took a bit of elbow grease !!


The top was really scraped up!


Once I sanded it all down on top, it was easy from there! I used Early  American by Mini wax, a favorite of mine, waited for it to dry, sprayed some polyurethane by Mini wax, a fast drying, clear semi gloss on it, then gave it a good cover with beeswax.


The grain is gorgeous!


For the bottom, I used a white chalk paint, but it bled through, so I decided to cover it with a gray spray  paint by Rustoleum called Stone Gray, once dry, I dry brushed it over with white chalk paint, then added wax to seal it!


 I love how it turned out! 

DESIGN TIP:

To get a designer/cohesive  look, choose items of the same family, such as beach themed, coastal, farmhouse, etc... Choose things of the same color, but different tones and always use texture! Play around with  balance and height and try to group things in 3's


This was a fun, easy project! Thanks for stopping by, have a great weekend!
Shirley x

Wednesday, June 7, 2017

Chalk Painted Sofa

Hi friends, It's been a while since I've posted! I have been super busy with my new business Beachwood Place! If you are ever in the Hampton Roads area please check us out @3littleblackbirds I will attach the address at the end of this post! 

Having a business like mine, I'm always looking for new and interesting ideas, although this is not a new idea, it's new to me!

 First, I started out with a spray bottle filled with water. Give your piece an even soak, not too wet, just enough to dampen the piece so that it will be easier for the paint to glide on.


Next, start painting with your favorite chalk paint! I actually made my own. It may take a few coats of paint, but it'll be worth it! Here is an example below!


I tried to add the video of me painting it, but it was too big of a file! Just make sure you paint evenly! I used a fine sand block to sand in between coats so that it will stay soft! Once you have finished, just like you would seal a piece of furniture, you will use a wax to seal it! Use a soft cloth and the wax of your choice to cover the entire sofa. Buff it up and that's all there is to it!


BEFORE


AFTER


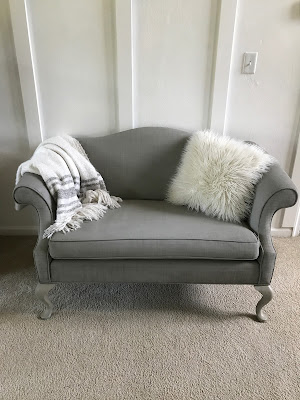
I loved how this turned out! It would be perfect in an entryway, dining room, kitchen etc.. I just staged it here to show how nice it would be in a dining setting!


For the legs, I wanted a light wood tone effect, so I painted them in three colors! I sanded them down, then dry brushed white for my first color, then gray for the second, then a mocha color for the third, finishing off with a soft brush of white!  I just played around until I got the look I wanted!


I love how you can still see the pattern!


The paint color I used is by Val spar, called Beige Shadow, it is the comparison to Annie Sloan's French Linen.
I found it on this blog! I can't believe how close they are!
Beaneathmyheart.net


Use in the living, bedroom or an entryway. 


Thanks for stopping by, I hope that I have inspired you to try chalk painting your piece! Have a great week and if you are in the Hampton Roads area please visit us @ 217 Battlefield Blvd S Chesapeake VA inside 3 Little Black Birds!

Shirley x


Wednesday, July 6, 2016

Diy Coastal Hall Tree


I have always loved this interpretation of a hall tree! 
Typically it would be some sort of seating area, which would be lovely, but I wanted to add the table instead!


I bought this perfect sized Bombay Company table on Craigslist. It was a dark brown, but I was going for a coastal look, so I used a soft cream called, Elegant Ivory Cream by Glidden. I sanded the edges lightly to give a worn, coastal look, then finished it off with Johnson's wax! 


Now the original hardware pops off the cream!


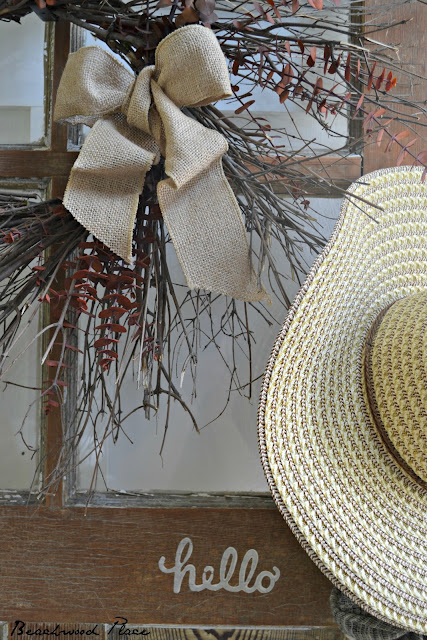
I thought it would fun to add a wreath and give the door more character! I added eucalyptus to make it smell good and a burlap ribbon for texture! The door was very weathered with chippy paint which was amazing looking, but I just wanted a more natural look, so I used a scraper and sander to take it all off! It took some time, but was worth it! I waxed the door to seal it! 


Just to give you an idea for different looks, I changed out the pillow underneath!


I love the pop of black and white!


I added a hook on either side to hang scarfs, hats and keys.


These old hinges are amazing! I took them off, gave them a scrub with a wire brush, then replaced them! I absolutely love how it turned out!


Today I added a new addition to my door! While shopping at +Hobby Lobby I found this cute stamp, "hello" I used the same paint as the table and stamped it onto the door!  It just adds a bit more character!


I hope I have inspired you! Have a great week!
Shirley x

Linking up to:

Follow me